I. I just started using Plusspec. I am currently working on a renovation project and I need to make the existing external wall. The wall is 230mm concrete with a 20mm layer of stucco/render on the outside. On the inside there is a 70mm layer of styrofoam insulation and again a 20 mm ayer of render/stucco. I have tried to go through the tutorials to try to understand how I make a custom wall assembly but not been succesful. Can anyone explain this to me?
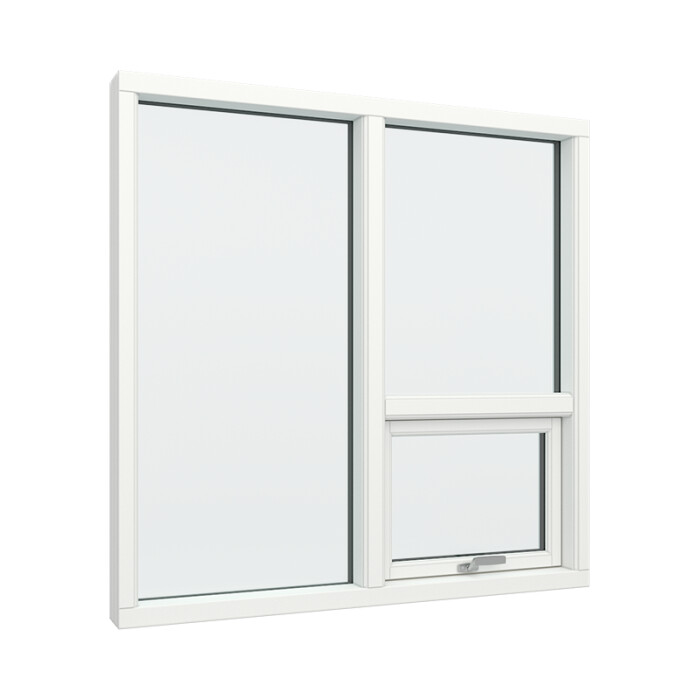
Also, I am struggling how to make custom windows. How would you go about making a window like the one in the picture below?
Hi user43,
Wall Assembly
To create the wall type you’re after I would recommend doing the following:
- Select the Solid Wall for the wall type to use & set the wall thickness to 230mm.
- Go to the external skin (this will likely show cladding) & create a material for the 20mm stucco/render on the outside of the wall.
- Go to the internal skin (this will likely show plasterboard/drywall) & create a material for the 70mm styrofoam insulation & 20mm stucco/render. The thickness of this skin will need to be the total size of both materials (i.e. 70mm + 20mm, therefore 90mm) & use the render/stucco as the texture image.
Custom Windows
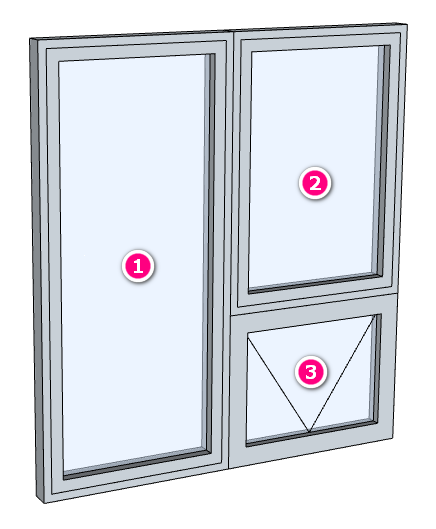
To make the custom windows (similar to what’s shown in your image), I would recommend using the ![]() Custom Window Tool to create each part of the window as a separate window type (shown in image below). Tip: To place custom windows in walls use the ‘None’ option in the
Custom Window Tool to create each part of the window as a separate window type (shown in image below). Tip: To place custom windows in walls use the ‘None’ option in the ![]() Window Tool to create the opening for the custom window to be placed into.
Window Tool to create the opening for the custom window to be placed into.
Thank you for the reply.
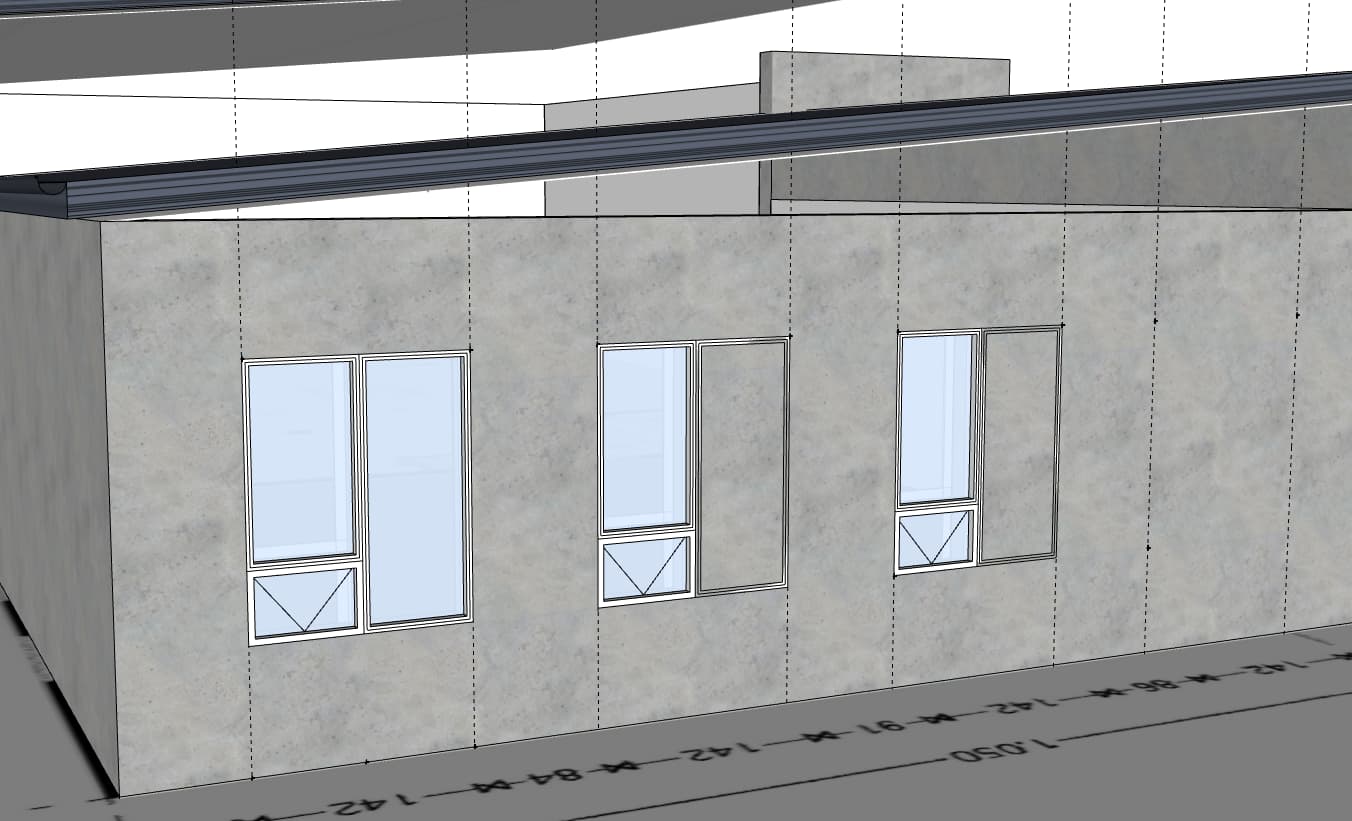
I tried to create three seperate windows. It is not great because you get a double mullion in the middle that you would not have in reality. This window is probably the most common window type in Scandinavia so it should really not be hard to make. This will also be an issue when doing window schedules I imagine, since this is three windows and not one.
I am also getting some really unpredictable results while copying windows around with the windowredfine tool. Sometimes it makes a hole in the wall and sometimes not.
“Hello @user43, welcome! It’s great to see a new member from Scandinavia here. BIM is like golf – the more you do it, the easier it becomes. If we have more Scandinavian users, we will make adjustments to work with your local regulations. Most of our users are from the UK, USA, New Zealand, France, and Australia. Hopefully, you will get the same benefits they do once you get past the initial learning curve and become a Tiger Woods ![]()
![]() .”
.”
You are currently working in SketchUp, which allows you to create any geometry, including a dynamic component to match your local requirements. You can quantify or report any SketchUp component and attach more information to it, (ideally the one mentioned above or use 3d Warehouse). To do this, select the window (any component) and add the necessary information using the PlusArchitect or PlusDesignBuild BIM tool ![]() to associate the name, tag (layer), supplier, price ETC ETC. I recommend using your existing window and then utilizing the BIM tool. Note you can now save these to your Sketchup component library for later use.
to associate the name, tag (layer), supplier, price ETC ETC. I recommend using your existing window and then utilizing the BIM tool. Note you can now save these to your Sketchup component library for later use.
copying windows around with the window re define tool
I’m uncertain why you are using the window redefine tool to move/duplicate the windows; it would be quicker to draw three windows with “none” selected, and then use CTRL +move to move the window into the opening.
I hope that helps, thanks for enquiring and feel free to ask more questions.