Hey @PrimeDesignHomes ,
looking at how you guys construct bastard hips, different pitches and the roof types over there,
based on my experience, I would approach it initially as below to save frustration:
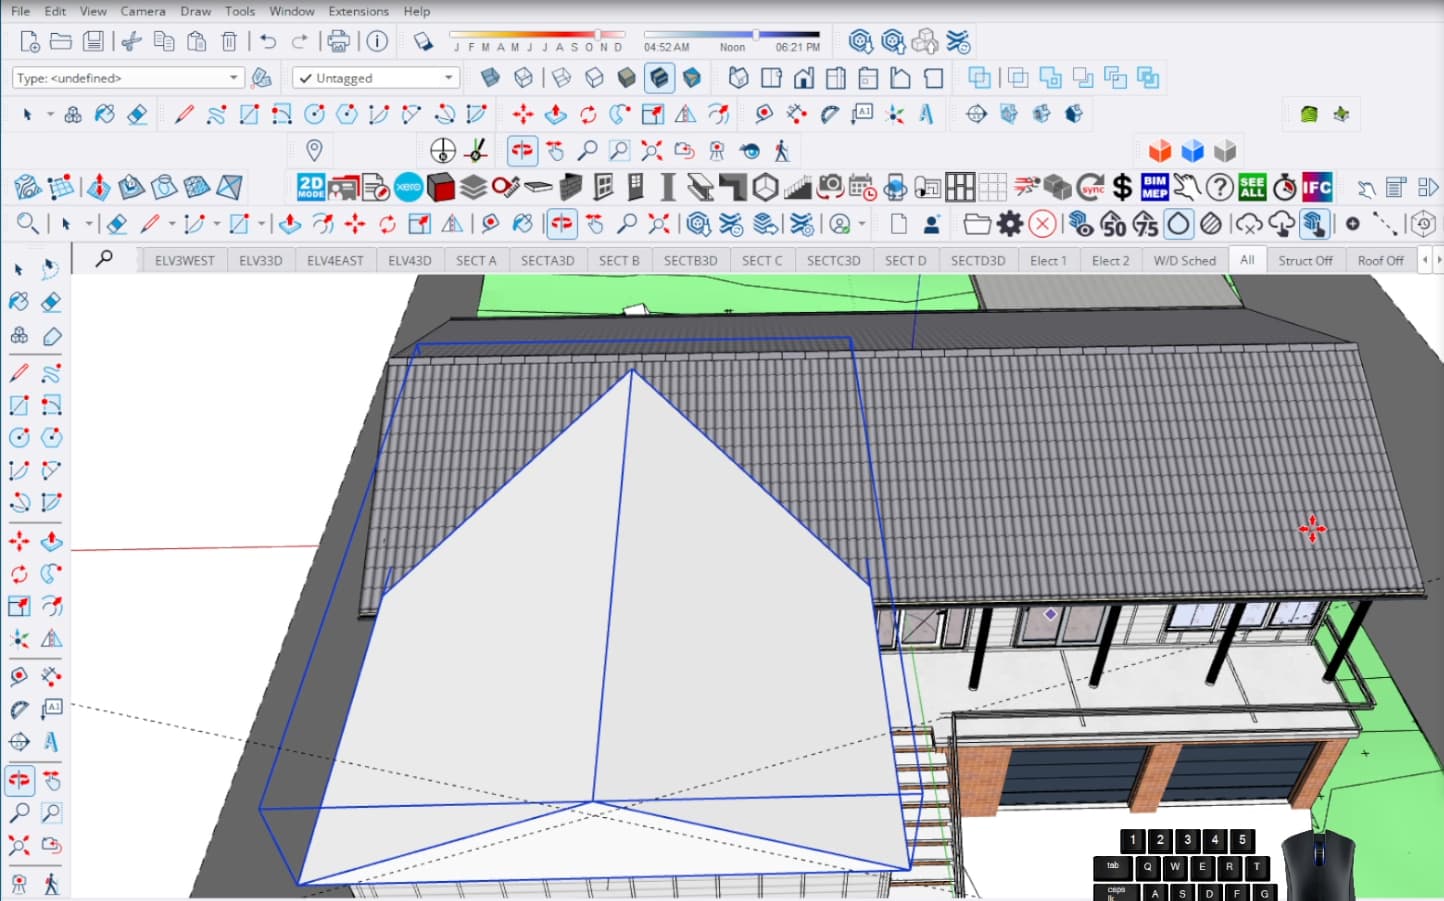
Create it quickly with the sketch up tools, and 2d plan and a pitched reference with faces, before using the plus spec dialogs. That way you can see how it works and input the correct values in the dialogs once you have something to work off.
You should start with a geometric flat face with snapping points to work off. Might even be some dwg files or dxf files from your existing home catalogue . Or create your own for each job.
Make sure you have intersections of roof plane transitions, gables valleys, hips, ridges.
Important note:
The outside of your fascia is the common factor here and I would unselect eave widths in the plus spec dialog and draw/ create from the overhang points (outside of eave ) and keep that as your typical pitching point, where the walls insect inside of that on your frame outline you would just have to adjust to suit the roof, once you have the roof right with your nominal over hangs and intersection points/ multi pitches aligned.
Create your pitched faces working off the 2d flat plan length arrangement will ensure it works too!
Then create it as a 3d representation once you have the 2d plan right.
You can do this by just starting off your nominal riser height/ pitch and connecting to the snap points to create the faces.
You may need to use the sketch up protractor tool where applicable too.
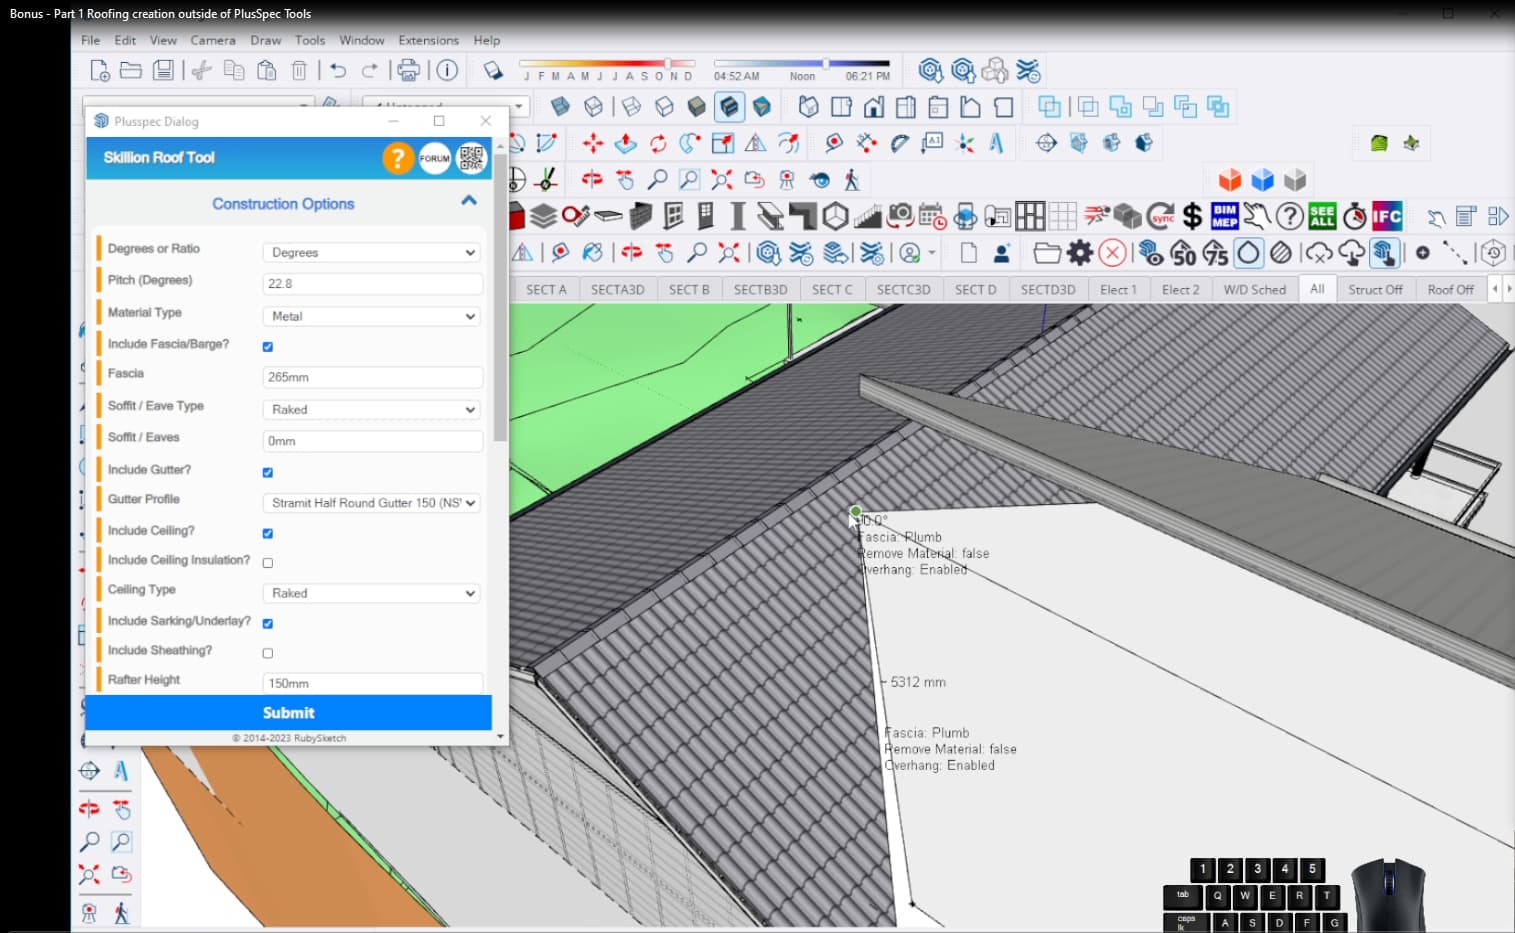
You are going to need this later to know the exact roof pitch, especially if you are looking to use the plusspec skillion roof tool.( which more than likely will be the case in your advanced roof scenario.)
(Alternatively, on some of my projects I draw a face with the dimension values required to use the plusspec dialog and delete off what I don’t need or use the SketchUp drape tool to put a cut line through the parts you don’t want, and you do want. (Always create a copy inside the sketchup interface to an even measurement so you can always reuse.) Don’t forget to save before doing anything major.
Once you have this dialled in you can always create the components with the plusspec tool, you maybe best to use the skillion roof tool.
Take note that the skillion roof tool works by tracing off a flat 2d plan starting with the gutter side first. This is where that 2d plan ( roof plan length template you made before ) will come into play as you will have to refer back to it and use it as the snapping point and lines to trace over with the skillion roof tool.
You may have to use the protractor tool and check the exact pitch off your sketchup reference to add the exact value in the plusspec dialog window to achieve perfect alignment.
Hope this make sense.