I would recommend following these steps to create the retaining wall you’re after. Hope this helps!
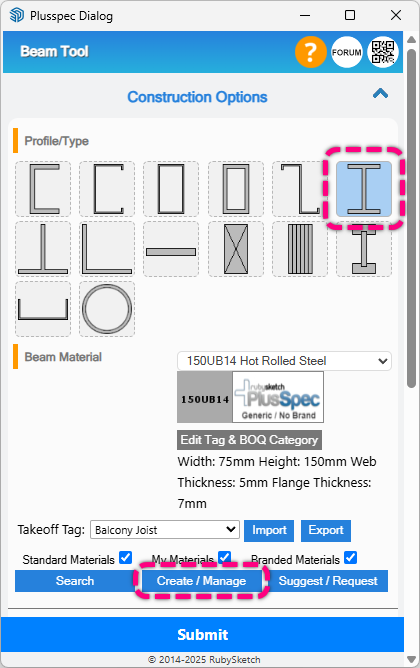
Step 1: Use the Beam Tool to create the C/H Section verticals by using the desired Profile/Type.
Tips:
To save you time, draw one beam then use the SketchUp Move Tool copy-move function to space the rest of the beams (either evenly or to specific spacings).
Use the Up arrow key to lock drawing the beam(s) vertically (along the blue axis).
Use the extend & trim beam features to modify the height of the beam(s) to suit (multiple beams can be done at once). I’d recommend doing this after Step 2 to save any double handling.
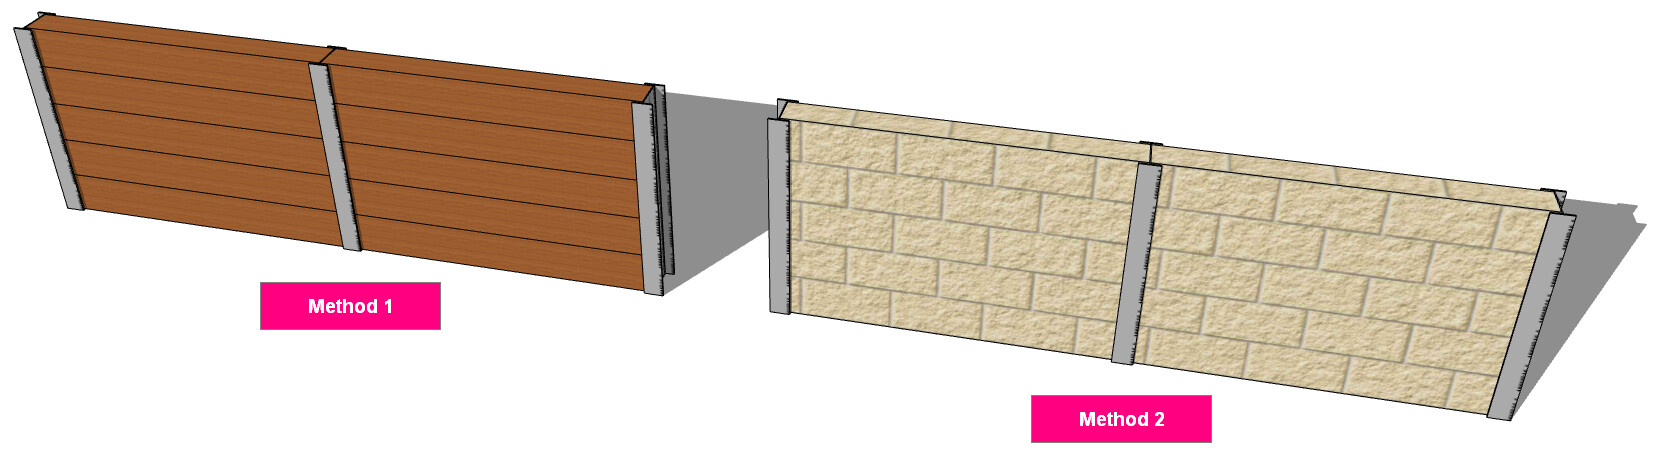
Step 2: Use one of the following methods (pending the required conctruction) to create the parts of the retaining wall between the verticals.
Use the Beam Tool to draw horizontal panels/beams (e.g. timber or concrete sleepers) if you want to estimate the lineal length of each panel/beam.
Tips:
To save you time, draw one beam then use the SketchUp Move Tool copy-move function to “stack” the beams ontop of each other.
Use the extend & trim beam features to modify the length of the beams (multiple beams can be done at once).
To create other materials (like concrete sleepers), select the profile that best matches the profile you need, then click Create / Manage & follow the steps to create a new material. Then use Edit Tag & BOQ Category to edit the material info.
Use the Wall Tool to draw the section(s) between the verticals if you want to estimate the area of these sections (e.g. masonry). Note: In the PlusDesignBuild Takoff Tool you can get an exact number of items from this area (i.e. how many bricks/blocks needed).
The steel beams I used are located under the Universal Beam category in the Beam Tool (outlined in the image below). If the beam size(s) you need aren’t available in the list, you can create your own materials by clicking on the Create / Manage button located below the material field (outlined in the image below) & following the steps.