Hi, I’m trialling PlusArchitect am stuck on the following:
Can we produce a terrain from a survey and include spot levels? I have watched the tutorial on pulling up contours but we need more manipulation than that so we can add other features that aren’t captured by the contours alone.
Is it possible to stretch a wall that isn’t connected to other walls? I don’t seem to be able to adjust the length of a single wall without deleting and starting again.
I’m not able to place a highlight window above another window, or a door under a highlight window.
I’m having issues with a door that I have placed in a wall. If I turn on a plasterboard internal lining in the wall the door doesn’t cut through. Other walls exactly the same work fine. I also got stuck in the tool with it not registering my clicks and couldn’t get out (that was probably user error).
I can’t get the wall surface tool to work despite having watched tutorials.
Welcome to the PlusSpec community! I’ve responded to each of your enquiries in the sections below.
Creating Terrains
Yes, terrains can be created from surveys using the Sandbox extension that comes with SketchUp. If the tool isn’t already on your screen it can be added by going to View > Toolbars & ticking the ‘Sandbox’ option (you may need to enable it in the Extensions Manager - Extensions > Extensions Manager).
If you get the surveyor to send you the DWG file of the survey, you can import this into SketchUp (File > Import) & then use it to generate the terrain for the site. Tip: Sometimes survey CAD files aren’t drawn at 1:1 scale, so make sure to check the scale before generating the terrain.
Adjusting Wall Lengths
Yes, the length of walls can be adjusted using the Redefine Wall Tool. This tool can also be used to adjust the overall height of the wall or the height of each end of the wall (which creates skillion/shed walls). I’ve outlined the steps to use this tool below.
Steps To Use The Redefine Wall Tool
Select the wall you want to edit.
Select the Redefine Opening Tool.
Hover over the end of the wall you want to adjust (the node should turn from a cross to a square).
Left-click in initiate the move, move your cursor in the direction you want to adjust the wall, then left-click again to finalise the move (you can also enter a distance & press Enter). Tip: Whilst the move is activated & along an axis, you can hold SHIFT to align the point with other geometry in the model (like you can when using SketchUp tools).
Stacking Openings
Openings can be drawn above each other but a few steps need to be followed to achieve the desired result, which I’ve outlined below.
Steps To Create Stacked Openings
Draw the lower opening first (ideally at the desired size).
Draw the upper opening next to the lower opening (ideally at the desired size, but this is not necessary if it won’t fit in the space beside the lower opening).
Select the Redefine Opening Tool & left-click on the “upper” opening to select it.
Select the middle node of the opening by clicking in the center of the opening OR by pressing the HOME key. All four outer nodes should now be red.
Left-click at a point to initiate the move (I’d recommend one of the corners of the opening), move your cursor up to the desired vertical position & left-click again to finalise the move (you can also enter a distance & press Enter). Note: If you draw the opening at the desired vertical position in Step 2 this step can be skipped.
Repeat the previous step but instead move the opening across to the desired position along the wall (i.e. so that it’s above the lower opening).
If the size of the upper opening needs to be adjusted, continue using the Redefine Opening Tool to select the nodes in the direction you want to adjust the opening & repeat steps in Step 5.
Internal Lining At Door Opening Issue
This can sometimes happen if the door opening is either too close to the start of the wall or is sitting outside the start/end of the wall. Is either of these the reason for your issue?
If not, would you be able to please provide more info & an image of the issue?
Wall Surface Tool Issue
I’m not able to replicate this issue. Would you be able to provide some more info on the issue & the steps you’re taking to get it?
Thanks Grant, most of that is working now.
Just a couple of things still:
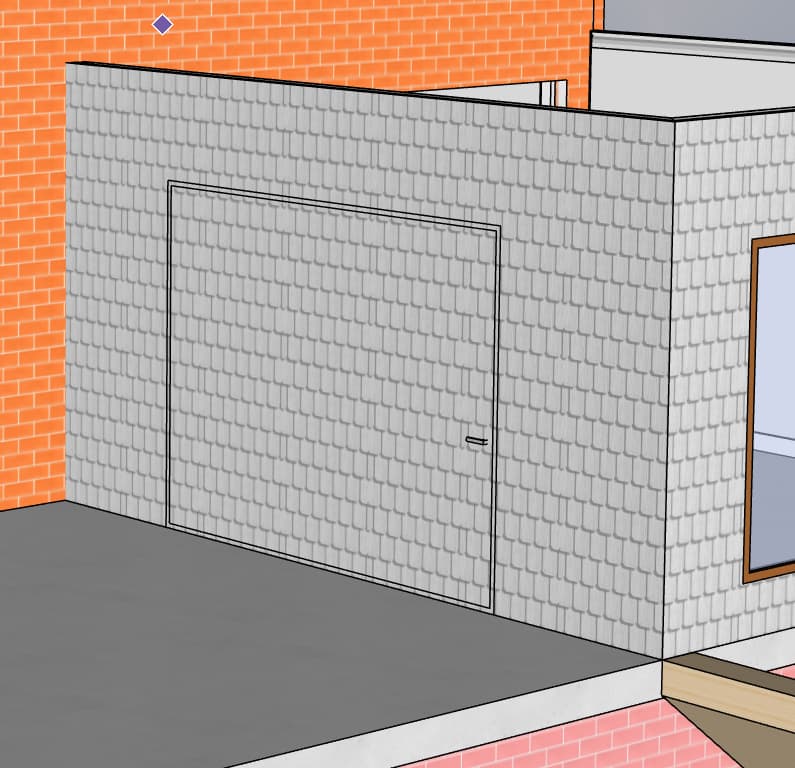
The particular door that wasn’t displaying correctly in now fine after adjusting for closeness to the end of the wall. However there is another one that is still not displaying correctly - see the image - and this time its not displaying on both sides of the wall.
As far as the wall surface tool goes, I think I have sorted out the issue but now have another one: the wall surface I am applying is now on my door as well as the wall. Can you help with this.
Also had to take this screenshot out
And one last issue: I have tried to import a dwg in order to make a terrain and am following all the steps ( file>import>select dwg check options>import but then nothing is placed. I’m sure there’s something simple I’m missing but it is alluding me.
The issue you’re having seem very odd & I’m not having any luck replicating them.
What I can recommend doing is to book in some training so that one of our trainers can better assist you with the issues you’re having, plus answer any other questions you may have. All our training sessions are recorded & sent to you afterwards so you can look back on what was discussed at your own pace.
For more information on our training, please follow the link below.