Hi team,
Have created a roof frame under a roof. The rafter ends protrude out past the fascia and can’t be adjusted using the edit roof framing option.
Hope you can help, thanks John
Hi team,
Have created a roof frame under a roof. The rafter ends protrude out past the fascia and can’t be adjusted using the edit roof framing option.
Hope you can help, thanks John
Hi John,
This is because the roof overhangs into the gutter & since this is the geometry used to generate the roof framing the rafters start there & not where the fascia is. We do have a change coming for this but there isn’t an ETA just yet.
In the meantime, I would recommend following this process:
Hi John, the reason you are seeing the rafters protrude through the fascia is that they have been created from the roof cladding, which actually overhangs the fascia by 50mm or 2 inches.
I am not sure what version of PlusSpec you are using? if it is the latest version you will see a checkbox that enables you to override this, and PlusDesignBuild and PlusArchitect will automatically deduct the overhang of the roof into the gutter and create the rafters to work with the fascia. Yet if you are using an older version I suggest using the sheeting or the sarking to create the rafters. You may need to lift the rafters up after drawing unless you have set your batten or sheeting depth to zero. I hope that helps.
Hi Andrew,
I have another rafter tool question for you, I have been unable to find an answer elsewhere.
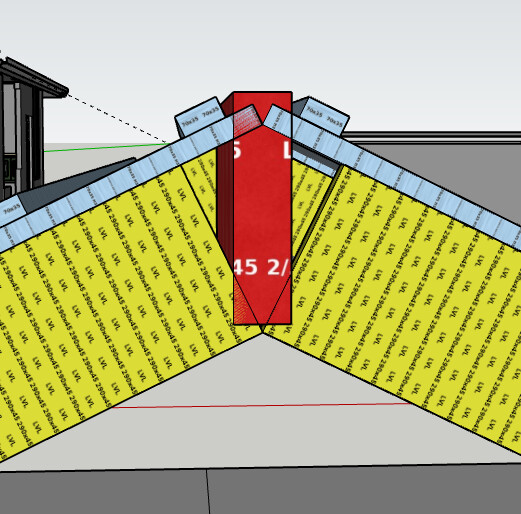
When I create a roof frame (Skillion Roof Tool in this example) all of the rafters get a plumb cut except for the end rafters. Is there a setting or something that could be causing this? It doesn’t matter a whole lot other than trying to ensure the takeoff is accurate. As per my image the rafters are being squared on the end and not tying into the ridge beam correctly.
Any help is appreciated.
Cheers,
James
Hi James,
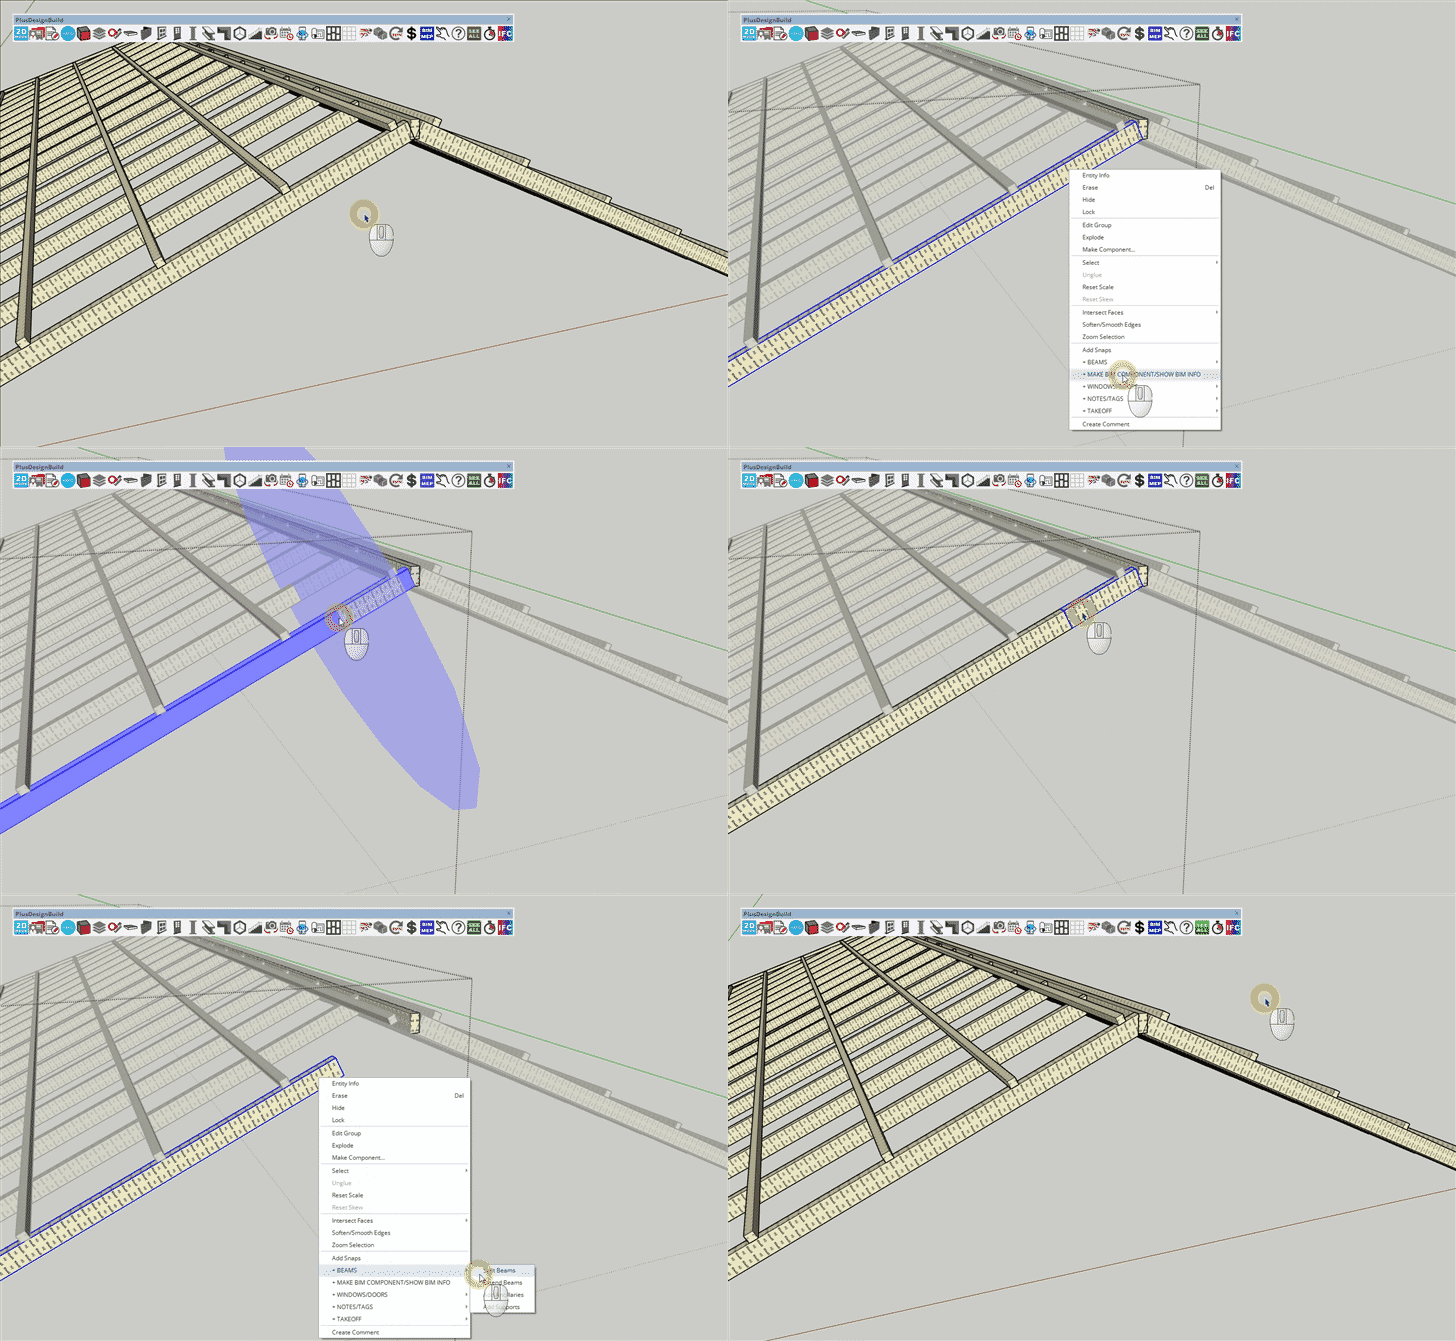
From my testing this only happens for the gable rafters when the roof framing is generated for skillion roofs or individually for each face of hip roofs. To resolve this & get the result you’re after, I would recommend using the Split Beam & Extend Beam features. Here are the steps I’d recommend to do this.
Please note that the above changes will be reverted & will need to be redone if the roof framing is edited using the  Roof Framing Tool after completing this process.
Great, Thanks Grant. Appreciate the quick reply. I did notice it only happened in the skillion roof option.
Cheers,
James