In the USA, the standard for jack studs are under the window and door headers. PlusSpec default is to draw the jack studs on the side of the headers. How do I command the jack studs to be placed under the headers? Often there are can be 2 to 4 jack studs depending on the header span, and the same for the king studs, but I cannot find the option for this either?
Hi trevengr,
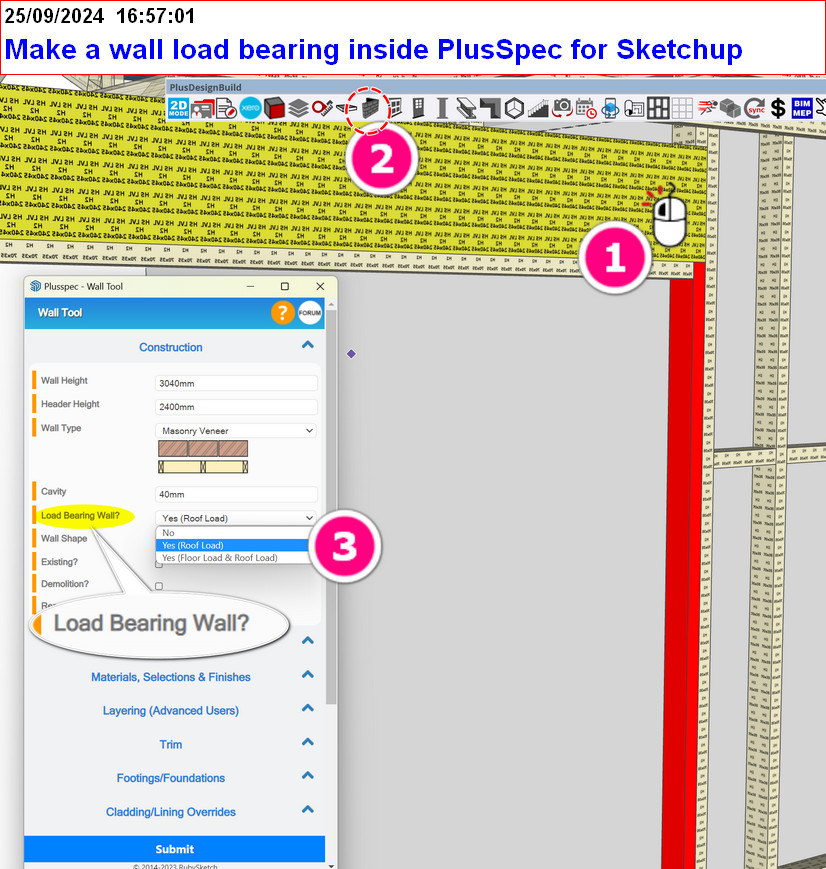
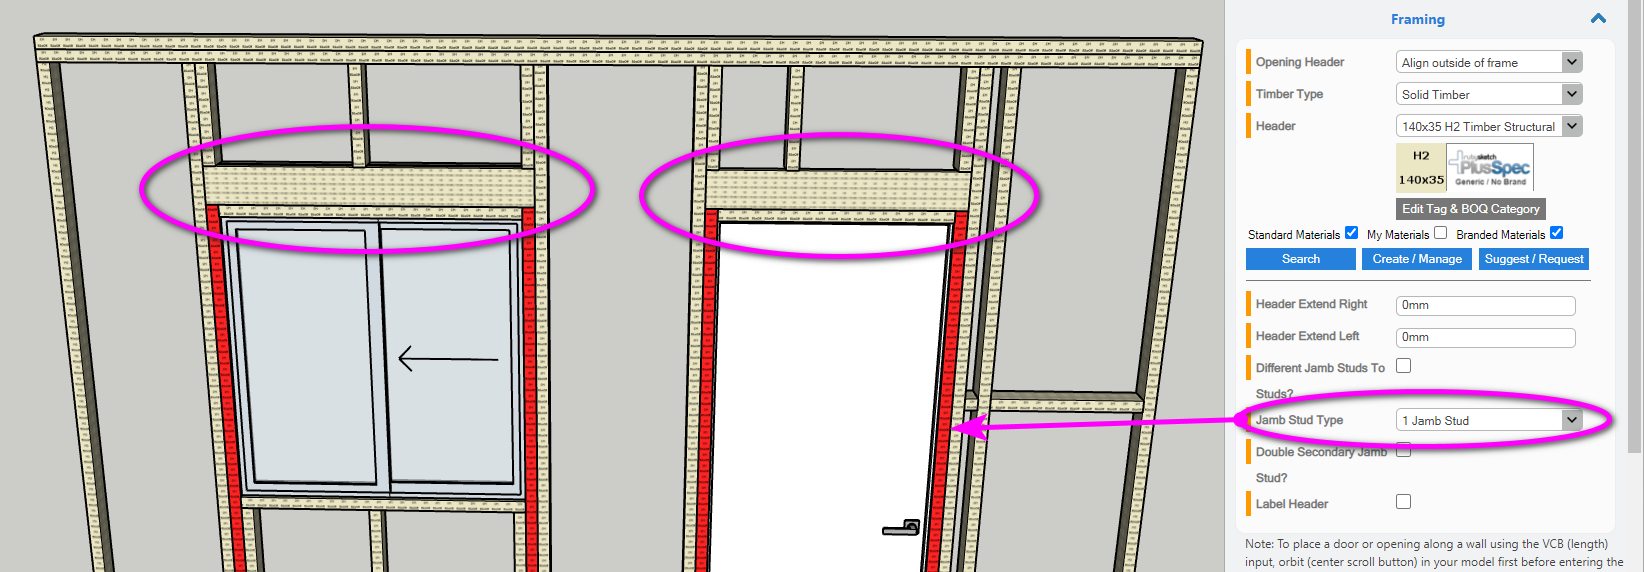
If you specify the wall to be Load Bearing (from the ![]() Wall Tool) the jack studs will appear under the window/door headers (outlined in the image below). You can also specify the number of jack studs under the header from the Framing section of the
Wall Tool) the jack studs will appear under the window/door headers (outlined in the image below). You can also specify the number of jack studs under the header from the Framing section of the ![]() Window Tool /
Window Tool / ![]() Door Tool (also shown in the image below).
Door Tool (also shown in the image below).
Alternatively, if you’re referring to removing the framing member below the headers (shown in image below), we currently don’t have an option of adjusting this in the dialogs. However, there are two ways to achieve the desired result which both include manually editing the frame. Note: Any manual edits will be reverted if/when the wall is edited using a PlusSpec tool, so make sure you make these changes at the end.
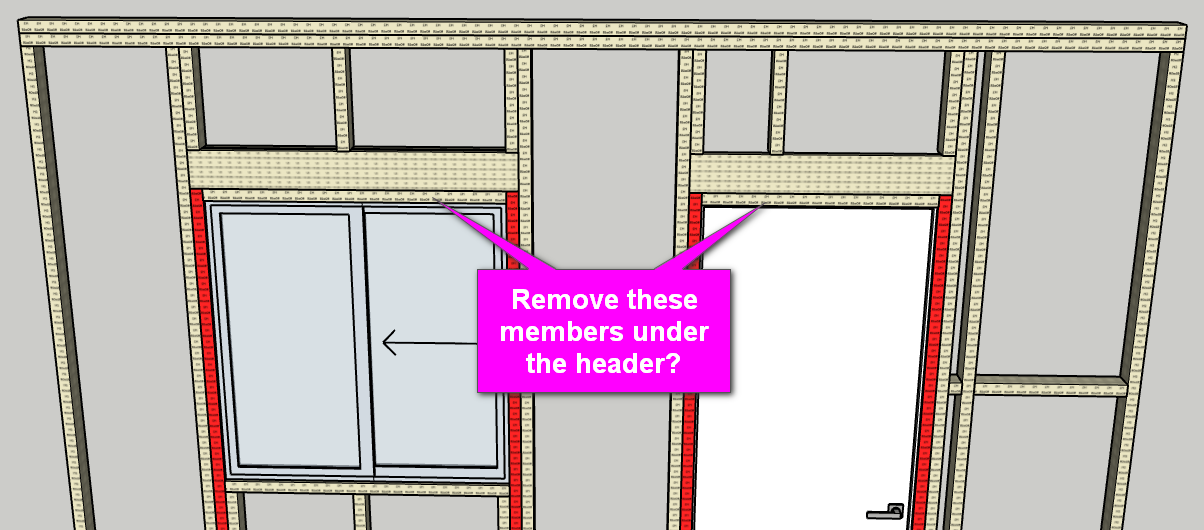
Option 1: Manually delete this member & draw additional overlayed openings. Here are the steps I’d recommend:
- Draw the opening in the walls using the None option from the
 Window Tool /
  Door Tool but reduce the header height the thickness of the member that will be removed. This will make the position of the header correct. Note: The opening in the wall may sit slightly lower but the framing should be correct.
 - Click into the framing group & delete the member below the header.
- Use the
 Custom Window Tool /
  Custom Door Tool to draw the actual, desired openings.
Option 2: Manually delete the member & manually adjust the frame to suit. Here are the steps I’d recommend:
- Draw the wall & openings as normal.
- Click into the framing group & delete the member below the header.
- Whilst still in the framing group, move the header down to the correct position.
- Whilst still in the framing group, manually adjust the geometry of the members above & below the headers so they align with the now position of the header.
Choose a structural wall in the drop-down before drawing the wall. If you’ve drawn the walls, select the ones that are supposed to be structural and change the settings in the wall tool. PlusDesignBuild will automatically add the jack stud under the header.