A photo or cross-section detail would make it much easier to answer the question. However, I understand you may not want to publicize your intellectual property, so it is best to book training with me.
i used a Solid Walls to do it, then attached all the components under recipes
@user32 It really depends on the system. In some cases, I recommend the solid wall tool for the polystyrene internal layer SIP systems, but it depends on how the wall elements are to be quantified and how it is to be built in the factory.
If the SIP wall is a Wood/Timber frame with multiple layers of bracing, wall wrap, and cladding, you may find using the LightweightMulti-Skin wall type the easiest way.
Guys, there have been significant updates to the wall tools in PlusDesignBuild & PlusArchitect, notably the ability to add battens in multiple locations to all wall types.
I’ve found it faster and more insightful to create several “test” wall types and try out different configurations.
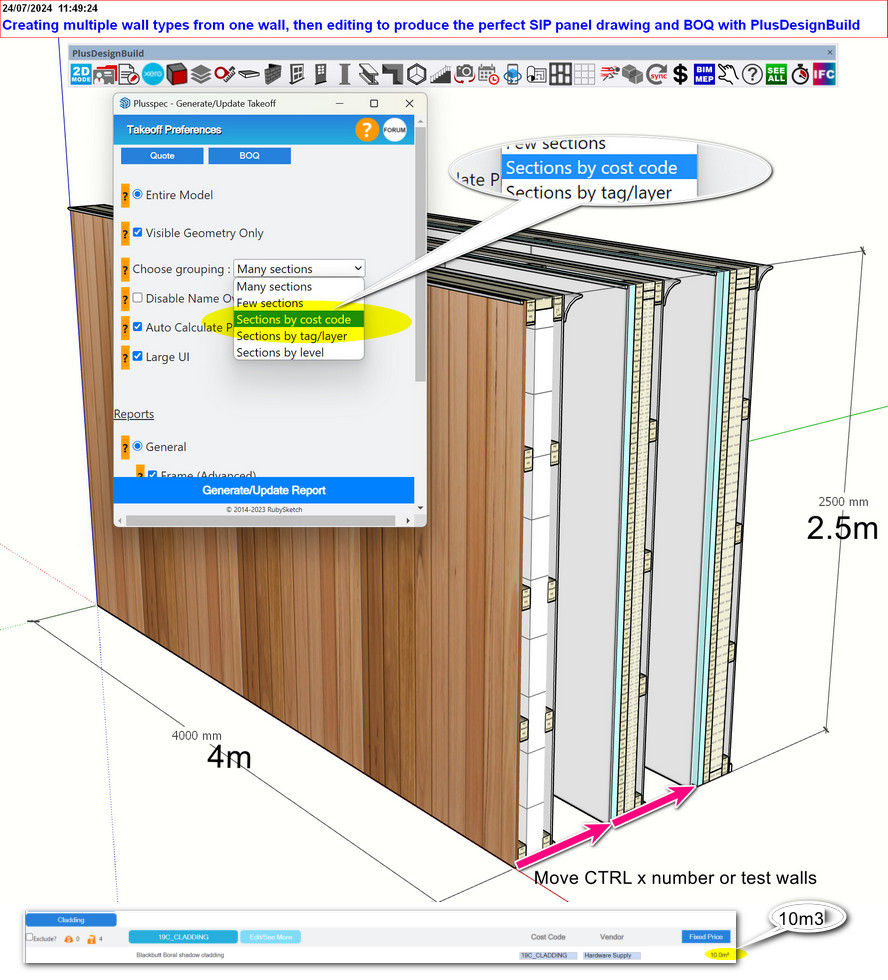
TIP 1: When creating “test” wall types, it’s best to use round figures for measurements. For example, a wall that is 2.5m high and 4m long, or 8ft high and 12.5ft long, so that the BOQ (Bill of Quantities) is in round numbers and easier to work with.
TIP 2: Copy and paste the wall in an array and edit each wall individually (It is faster to use a keyboard shortcut to edit and draw; I set my wall tool to draw and edit to “W”).
TIP 3: Once you have created most standard wall types, create a Vignette VIDEO HERE and associate them and variations with different depth floor cassette systems VIDEO HERE. This will make designing with SIPS much faster.
However, if you are using cross-laminated timber, where the core is to be quantified in cubic measures, you could use a solid wall. You can also use the double masonry wall with a recipe to convert square measures into cubic & change the cavity to zero, giving you more options.
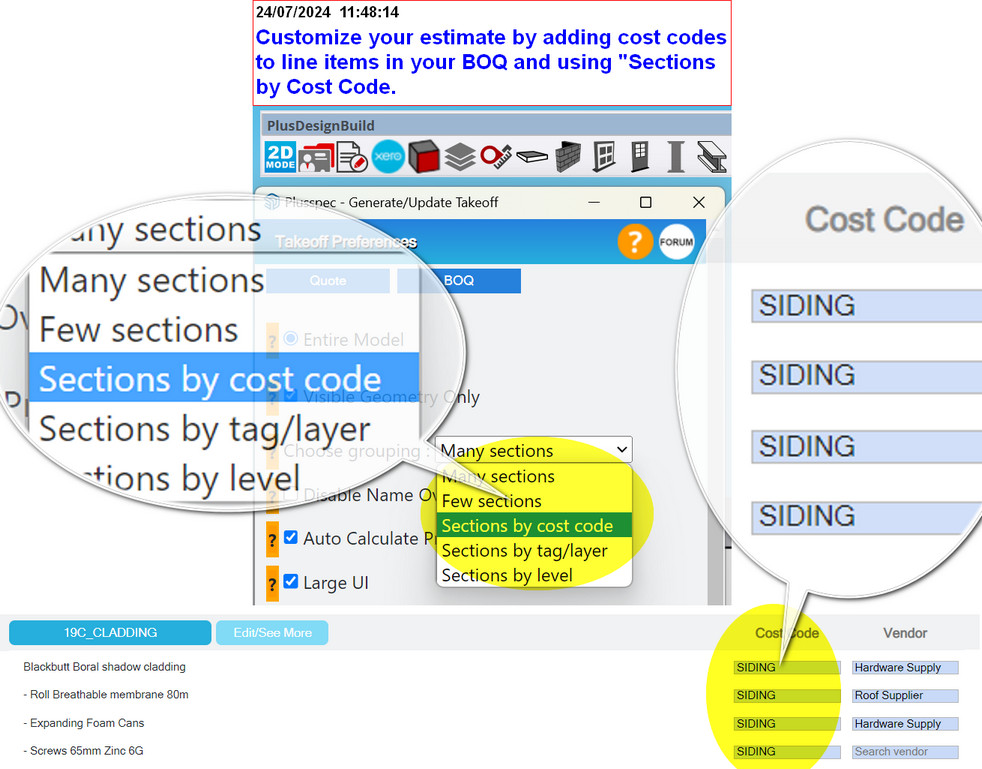
TIP4 To ensure materials are organised into a category in your BOQ/ Estimate, you could use:
-
Takeoff By Item code option
-
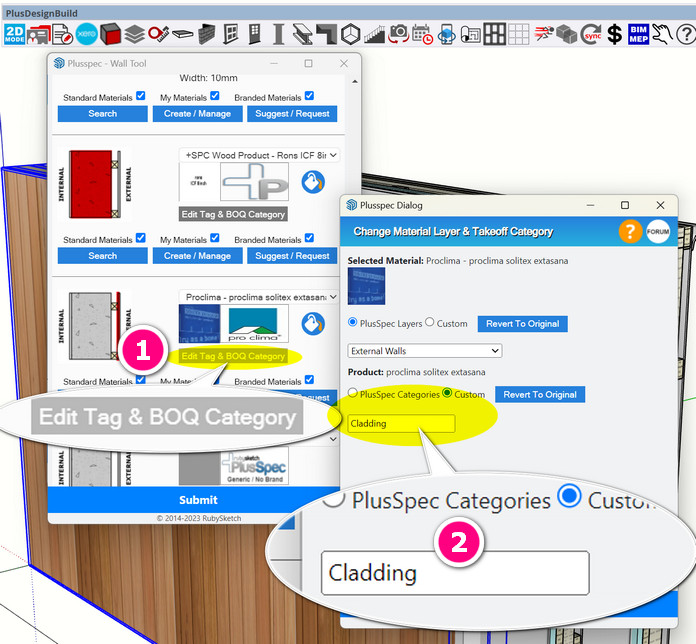
Use Create a custom category in the “Edit Tag & BOQ Category.”