Hi guys and girls, welcome to the world of 3D design; it’ll change your life.
Today I will talk about the first thing you do after you Install Sketchup and your PlusSpec version. I’ll get straight to the point:
Set up PlusSpec to work with your location and Unit of measure (EG Metric or Imperial). There’s no point using Australian materials if you are in America or the UK.
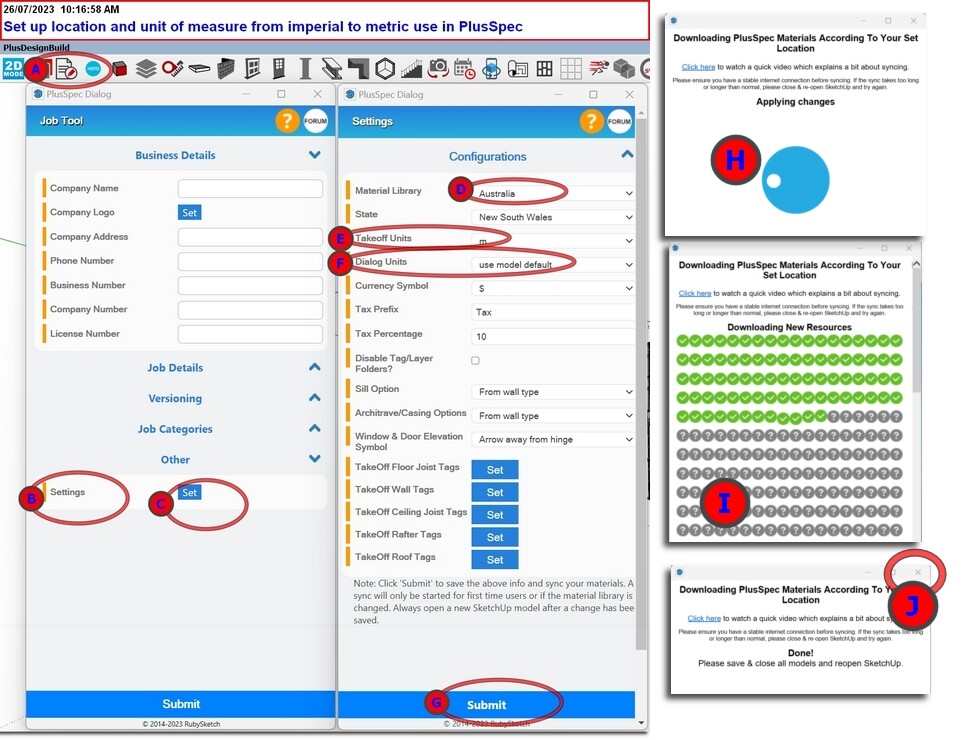
A) Click the Job/Project tool; it looks like this: :job-tool: n the PlusSpec toolbar. If you don’t see your PlusSpec toolbar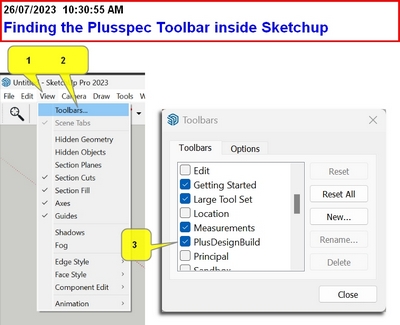
B) Inside The Job tool, scroll down to settings
C) Click the blue button to the right.
D) Choose your country or the nearest country to you Eg Canada uses Imperial. Choose the USA
E) Set your Takeoff units. If you draw in imperial, you’ll want your BOQ in Imperial not metric. So select your preferred Unit Of Measure (UOM)
F) Set your Dialog Units. A dialog Unit is how you prefer to write in measurements. Eg In Australia, we want our Bill of Quantities BOQ to be in Metres; however, we usually type measurements in millimetres & the USA will Type in Inches and want a BOQ in Feet.
G) Click Submit.
H) You will see a dialog that will get you set up.
I) Now PlusSpec downloads all the materials that help you draw quickly. Depending on your internet download speed, this could take 10 minutes or more. Be patient, as PlusSpec will only work correctly after completing this step.
J) Close the dialog and start drawing.