Hi Team
Is there some guidance/advice on best options to produce Electrical Layout Plans - showing Ceiling Fans, Power Points, Switching, Smoke Detectors etc
Maybe there is a quck and easy way and also a more 3D to 2D Layout Plan Option - Demos for both would be great ![]()
Thanks Dave. I will make a tutorial when I get a chance. It would be best if you looked at the Tutorial model it has an example in it (See the image below)
In Short, to create an electrical layout follow these instructions:
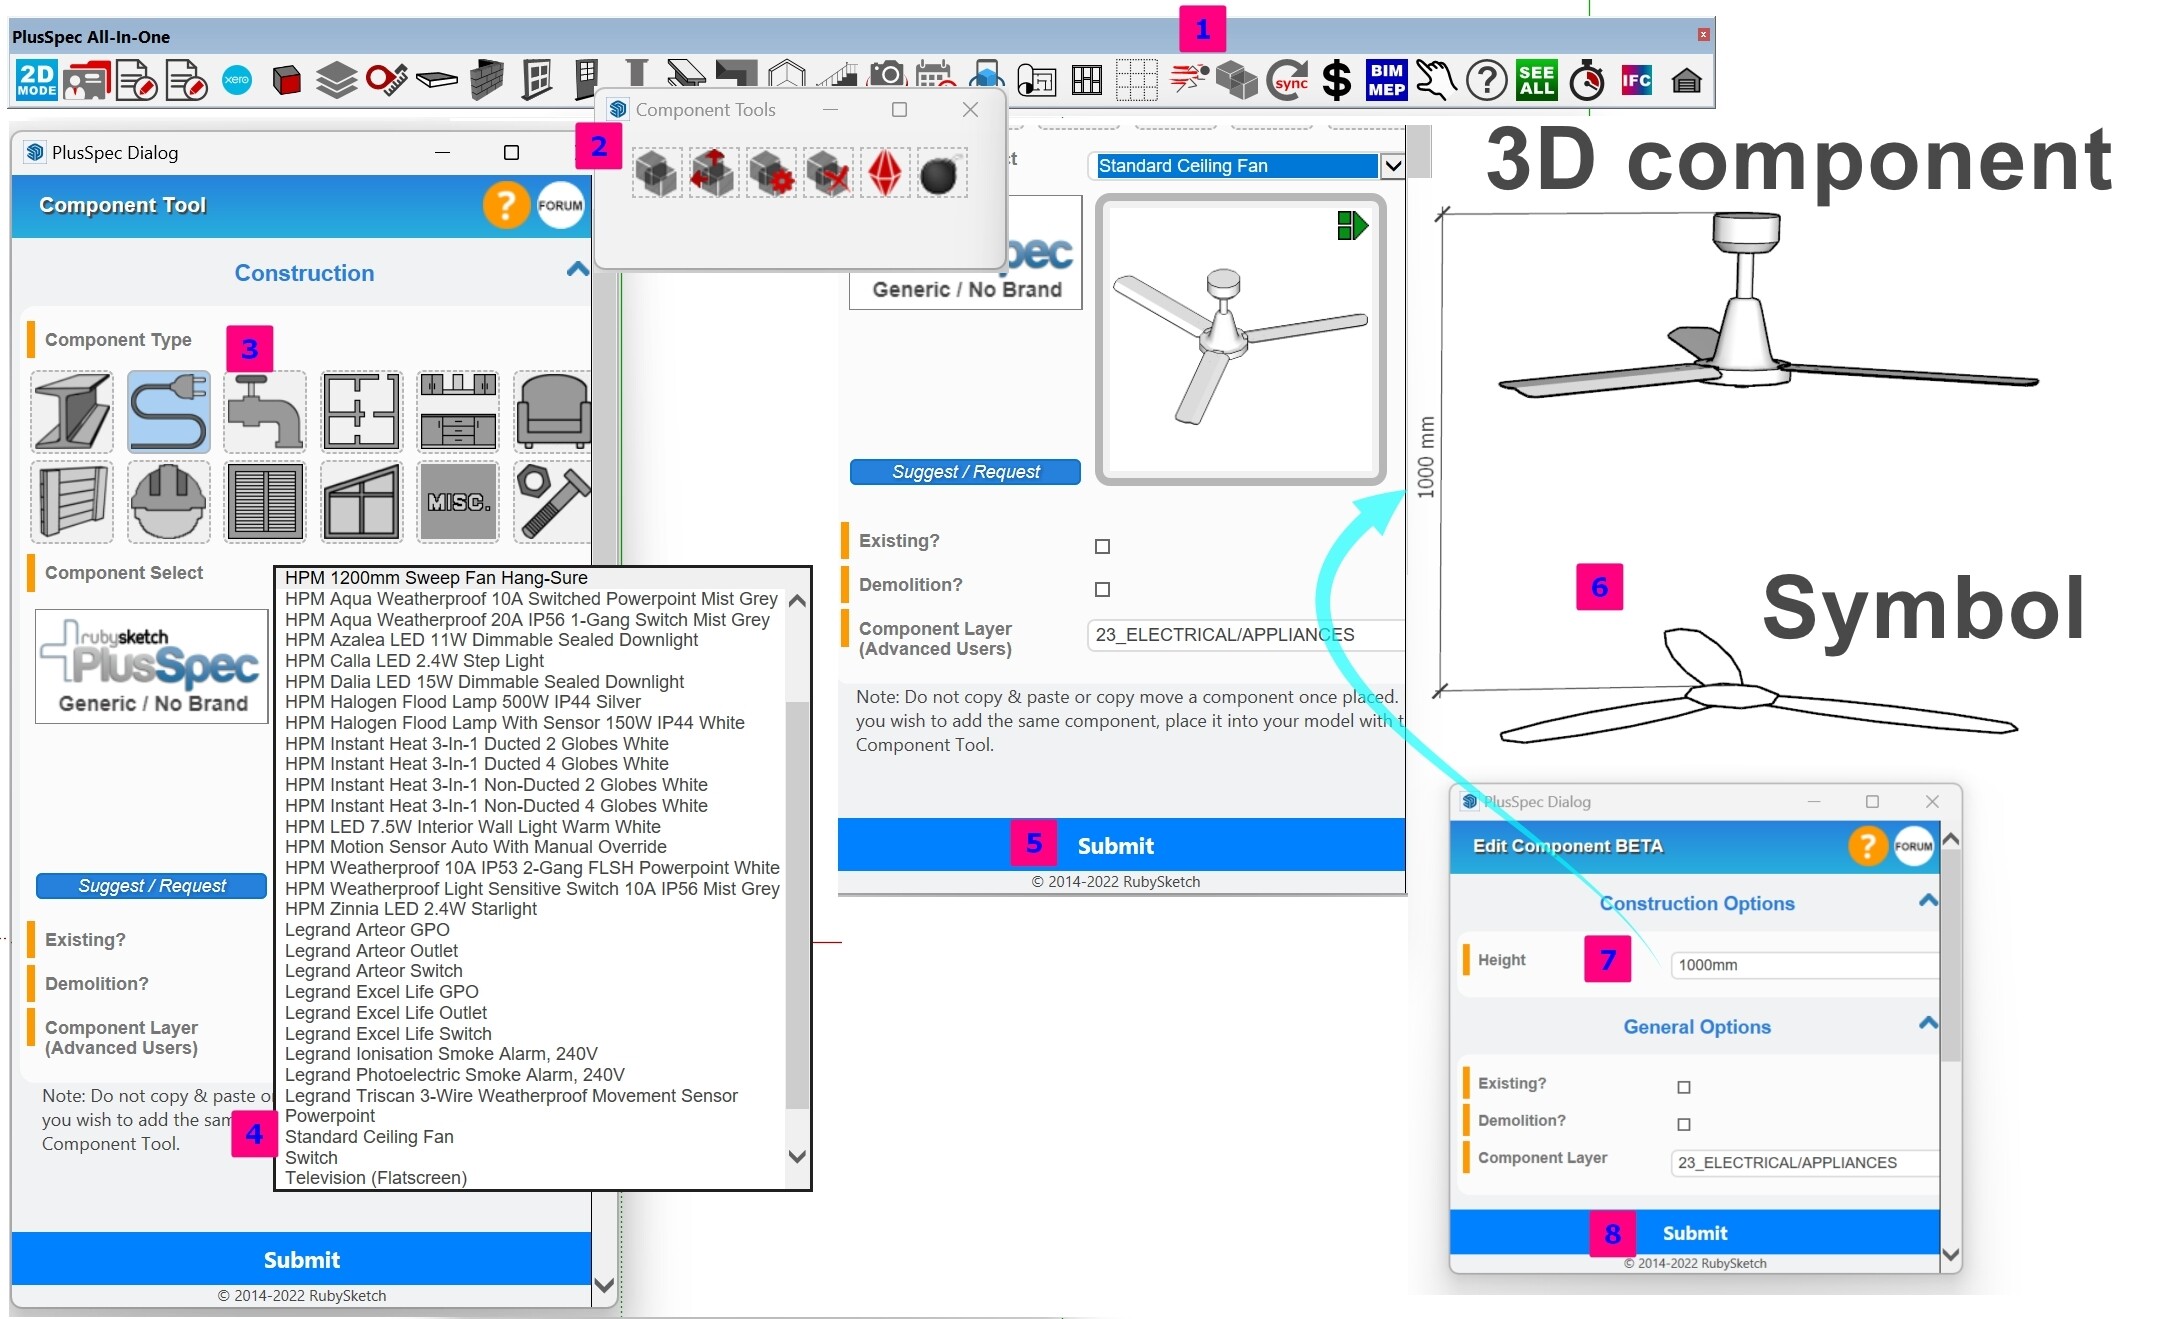
- Go to the component tool :component-tool:
- Choose the first component icon ( 2 cubes)
- Choose the second icon inside PlusSpec showing the electrical plug
- Click the dropdown and choose an electrical item
- In the detailed view you can change the tag/Layer name ( not recommended unless advanced user) & then click submit
- Click in the model space inside Sketchup and place the component where desired. NOTE; you should be in the “Elect1” or “Elect 2” scene or click see all and use a section cut
- type in your ceiling height: this will place the electrical symbol on the floor and the electrical component at the height chosen.
- Click submit
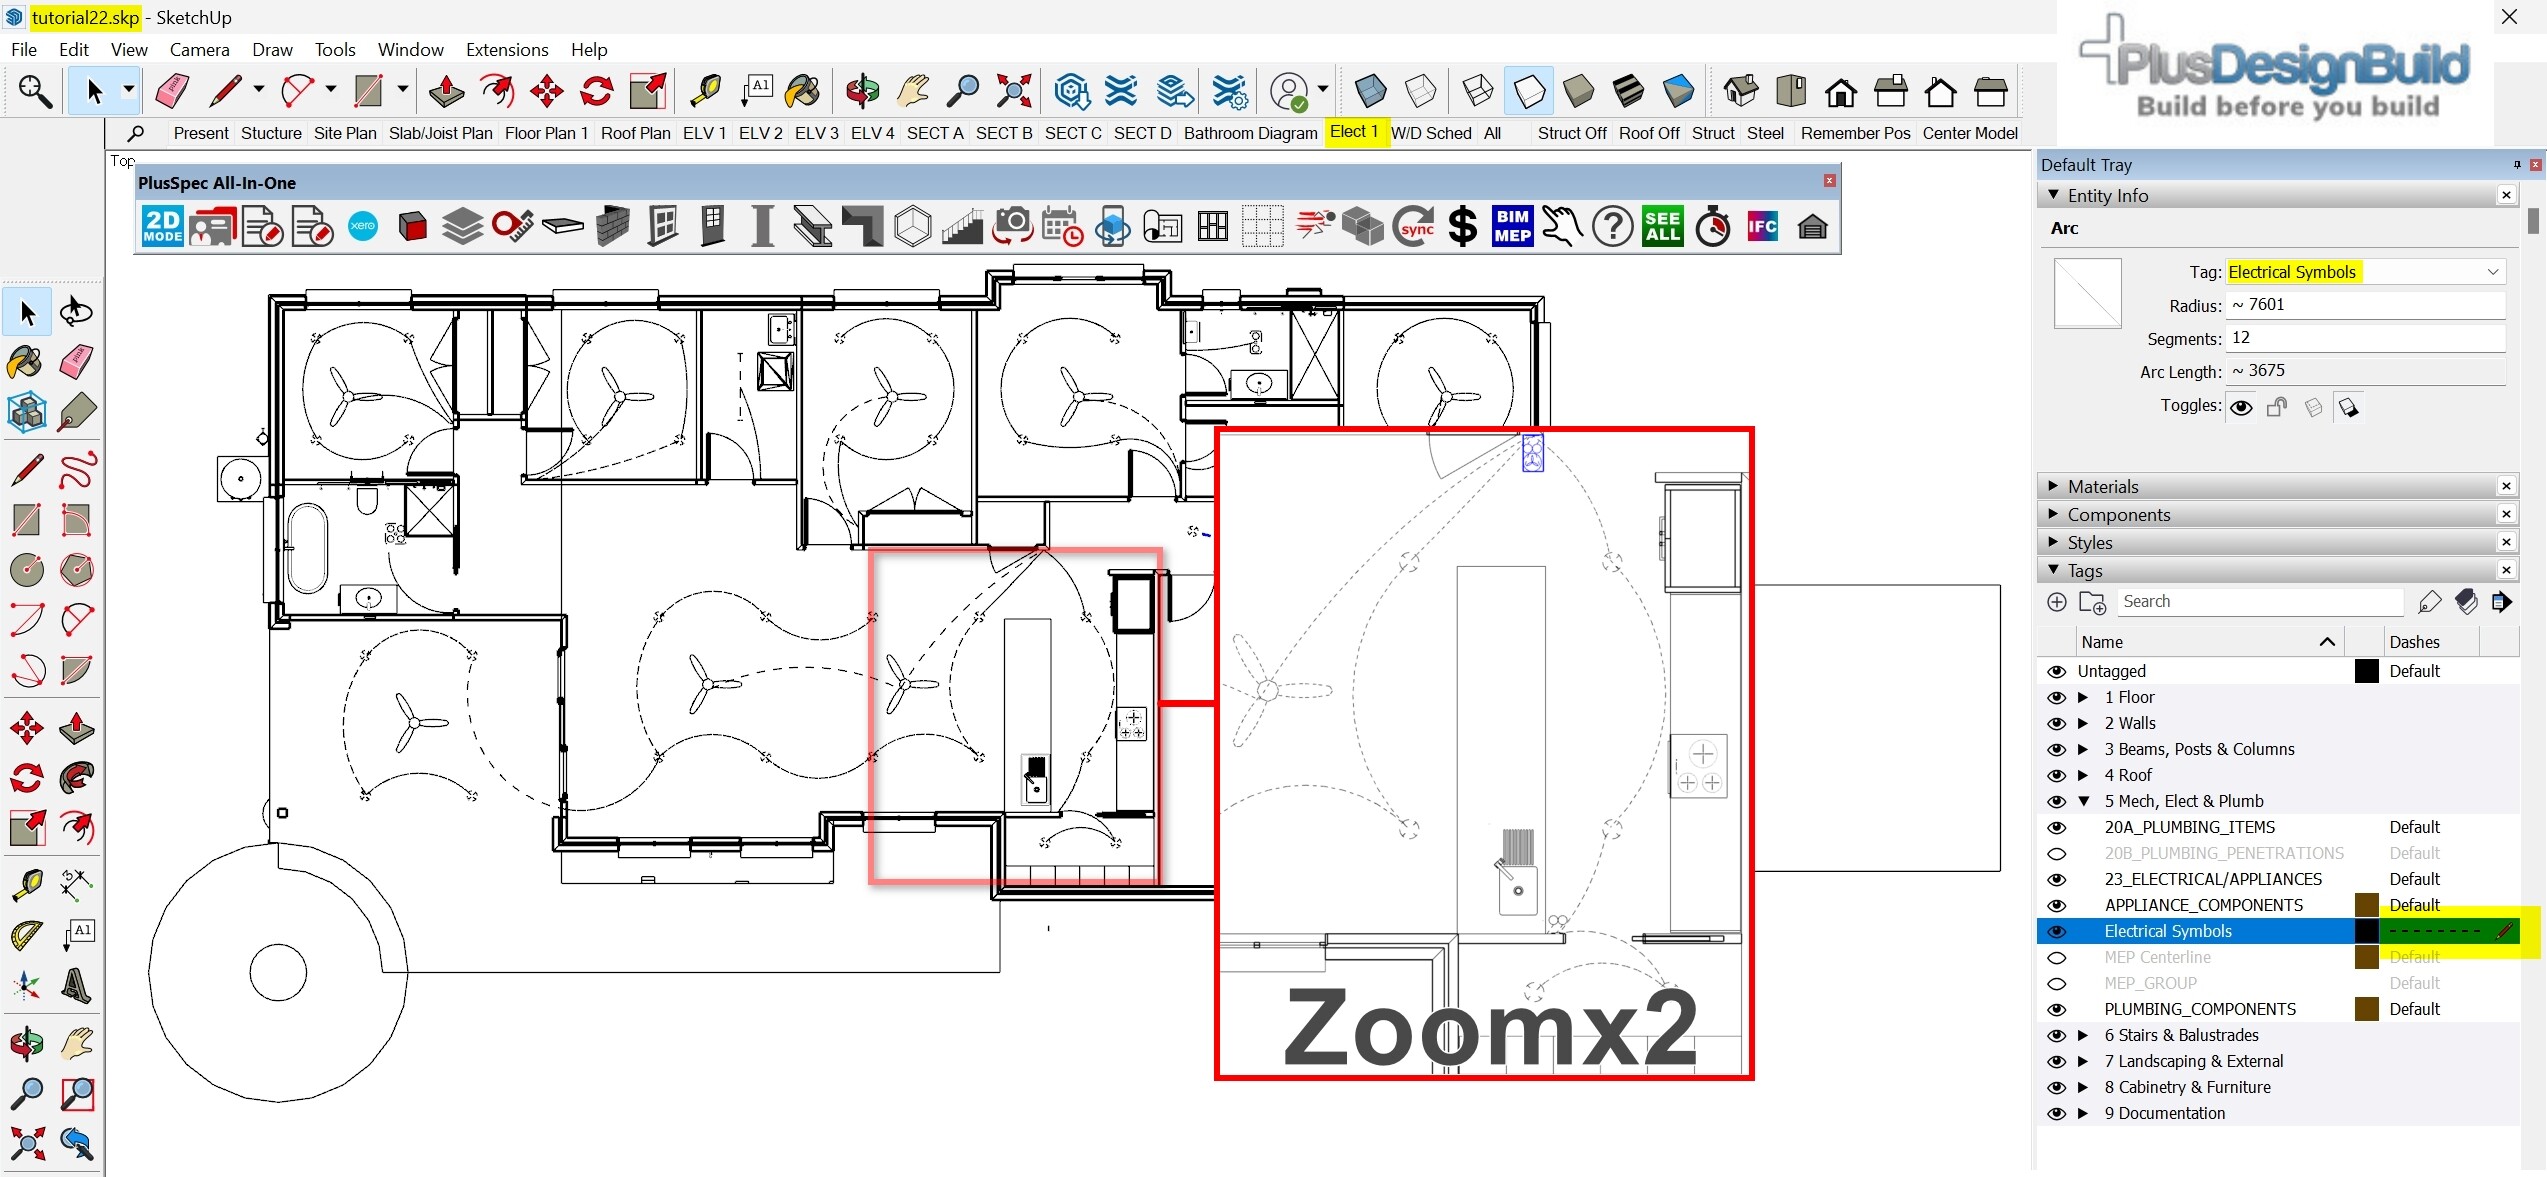
- Click the Elect1 Scene to view TIP (use the “all” scene in the scene creator tool :scene-gen: )
Below is a screenshot of the electrical layout that is inside the free tutorial model in PlusSpec, PlusArchitec or PlusDeisgnBuild
Andrew - is there a way to import more components into the electrical tool? in the tutorial there is a lot more options than i have visible?
Thanks!
Hi user33,
There currently isn’t a way to add more components to any of the sections within the Component Tool. If you’d like to add components to your own component library then here are some options.
- Right-click on the component & select ‘Save As…’, than save the component when the dialog appears (it’s recommended to create a folder so the components are separated into categories). The component will then appear in the Components section of the Default Tray (note: if a folder was created it’ll appear within that folder).
- Create a folder on your computer & save the components in there for later use. Tip: Using a shared drive is highly recommended if multiple people need access to the components & also for a cloud-base backup.
Also, the reason that Andrew has more components in his list was because he had the Australian library installed. This library has some additional branded components but most of the components there are the same as the other libraries.